Progressive Web Apps: Complete Guide to Building Your First PWA from Scratch

So What We Gonna Build?
We'll build The Gist Today, a simple news-reader app that will fetch the latest news articles from a public API based on a user's interests and preferred language.
The inspiration for this app comes from Inshorts, which is one of my go-to apps for quick news updates. A news-reader app is also a good subject for a tutorial as it brings together various concepts and is "just-enough" complex to demonstrate the capabilities of a PWA.

Here are some features our app will have:
- Allow a user to select their interests and language preferences.
- Fetch and display 5 latest news articles, per interest category, from a public API in the user's preferred language. The API I'll be using is NewsData.io, which has decent free tier options. You can also use others, some good options are NewsAPI.org, GNews.io & WorldNewsAPI.com.
- It will be installable and come with its own set of custom icons and splash screens to provide a full-screen experience.
- Demonstrate the working and lifecycle of a service worker. A service worker can intercept network requests, cache content in advance and use different mechanisms to ensure fast loading and offline capabilities.
This will be a fully functional app on its own which you can install, use and also further build upon it with more features as per your liking.
We'll use only core web technologies — HTML, CSS, and vanilla JavaScript. A basic understanding of these is expected. Not using any other frameworks or third-party libraries will allow us to focus on modern ES6 features and the latest Web API features.
Now I'll be donning my teacher's hat for the rest of this guide, so expect some typical hand-holding along the way. If you're an experienced developer however, feel free to skim to the later sections.
The JS sections are more detailed to cover everything from basics to advanced pertaining to a PWA, without overwhelming a beginner.
Designing Our App
Now that we've the basic structure of the app ready, let's create the stylesheet for it. Here is the complete CSS code (barring the news-list section which will be created dynamically via JavaScript and we will design it then):
/css/stylesheet.css
:root {
  --theme-color: rgb(17, 0, 126);
  --variant-color: #202aaf;
  --card-background: #1e0d8c;
  --ascent-color: #8a046c;
  --highlight-color: #8e3597;
  --descent-color: #65206e;
  --text-color: ivory;
}

* {
  margin: 0;
  padding: 0;
  box-sizing: border-box;
}

body {
  font-family: Cambria, Arial, sans-serif;
  font-size: 1rem;
  line-height: 1.6;
  background-color: var(--descent-color);
  color: ivory;
  padding: 7px;
}

h1 {
  font-size: 2.1rem;
}

h2 {
  font-size: 1.5rem;
  margin-bottom: 10px;
}

h3 {
  font-size: 1.3rem;
}

.hidden {
  display: none;
}

.btn {
  background-color: var(--ascent-color);
  color: white;
  border: none;
  border-radius: 5px;
  cursor: pointer;
  box-shadow: 0 4px 6px rgba(0, 0, 0, 0.15);
  transition: background-color 0.2s, box-shadow 0.2s, transform 0.2s;
}

.btn:hover {
  background-color: var(--highlight-color);
  transform: translateY(-2px);
  box-shadow: 0 6px 10px rgba(0, 0, 0, 0.2);
}

.btn:active {
  background-color: var(--descent-color);
  transform: translateY(1px);
  box-shadow: 0 2px 4px rgba(0, 0, 0, 0.15);
}

#app-section {
  background: var(--theme-color);
  padding: clamp(10px, 3vw, 30px);
  border-radius: 7px;
}

#app {
  max-width: 1200px;
  margin: 0 auto;
}

header {
  background: linear-gradient(180deg, var(--variant-color) 37%, var(--ascent-color) 100%);
  padding: clamp(10px, 2.5vw, 20px);
  text-align: center;
  border-radius: 5px;

  .tagline {
    font-size: 1.3rem;
    font-style: italic;
  }

  .emoji {
    font-size: smaller;
  }
}

main {
  margin: 20px auto;
  padding: 10px;
}

#user-preferences {
  form {
    display: flex;
    flex-direction: column;
    gap: 10px;
    margin: 15px 0;
    align-items: start;

    * {
      font-size: 1rem;
      font-family: Arial;
    }

    /* Covers checkboxes and select dropdown */
    label {
      display: flex;
      align-items: center;
      gap: 5px;
    }

    .user-language {
      width: 100%;
      gap: 10px;

      select {
        font-size: smaller;
        flex: 1;
        padding: 5px;
        border: 1px solid #fff;
        border-radius: 5px;
        background: transparent;
        color: white;

        option {
          background-color: var(--theme-color);
        }
      }
    }

    .user-interests {
      width: 100%;
      border: 1px solid #fff;
      padding: 10px;
      border-radius: 5px;

      legend {
        font-weight: bold;
      }

      /* Creating a grid of max 4 columns */
      #interests-checkboxes {
        display: grid;
        grid-template-columns: repeat(auto-fit, minmax(max(150px, (100% - 15px) / 4), 1fr));
        gap: 5px;
      }
    }

    .submit-btn {
      margin: 10px auto;
      padding: 10px 50px;
    }
  }
}

#display-news {
  display: flex;
  flex-direction: column;
  gap: 10px;

  p {
    margin-bottom: 10px;
  }
}

#alert-box {
  position: absolute;
  left: 50%;
  transform: translateX(-50%);
  bottom: 20px;
  z-index: 6;
  background: black;
  width: 90vw;
  display: flex;
  justify-content: space-between;
  padding: 10px 20px;
  align-items: center;
  color: white;

  &.hidden {
    display: none;
  }
}

#alert-close-btn {
  padding: 1px 4px;
}
There is nothing PWA specific here, you style just like any other normal web-page. What is important is the design should be responsive and look good on any device.
In the above design, I've kept things simple. Only used common fonts- Cambria and Arial, which are widely available, a blue-purple color scheme, and a flexbox/grid based layout.
You can of course, customize the design as per your liking. Just make sure to keep the theme-color meta tag in the head section of index.html in sync with your design.
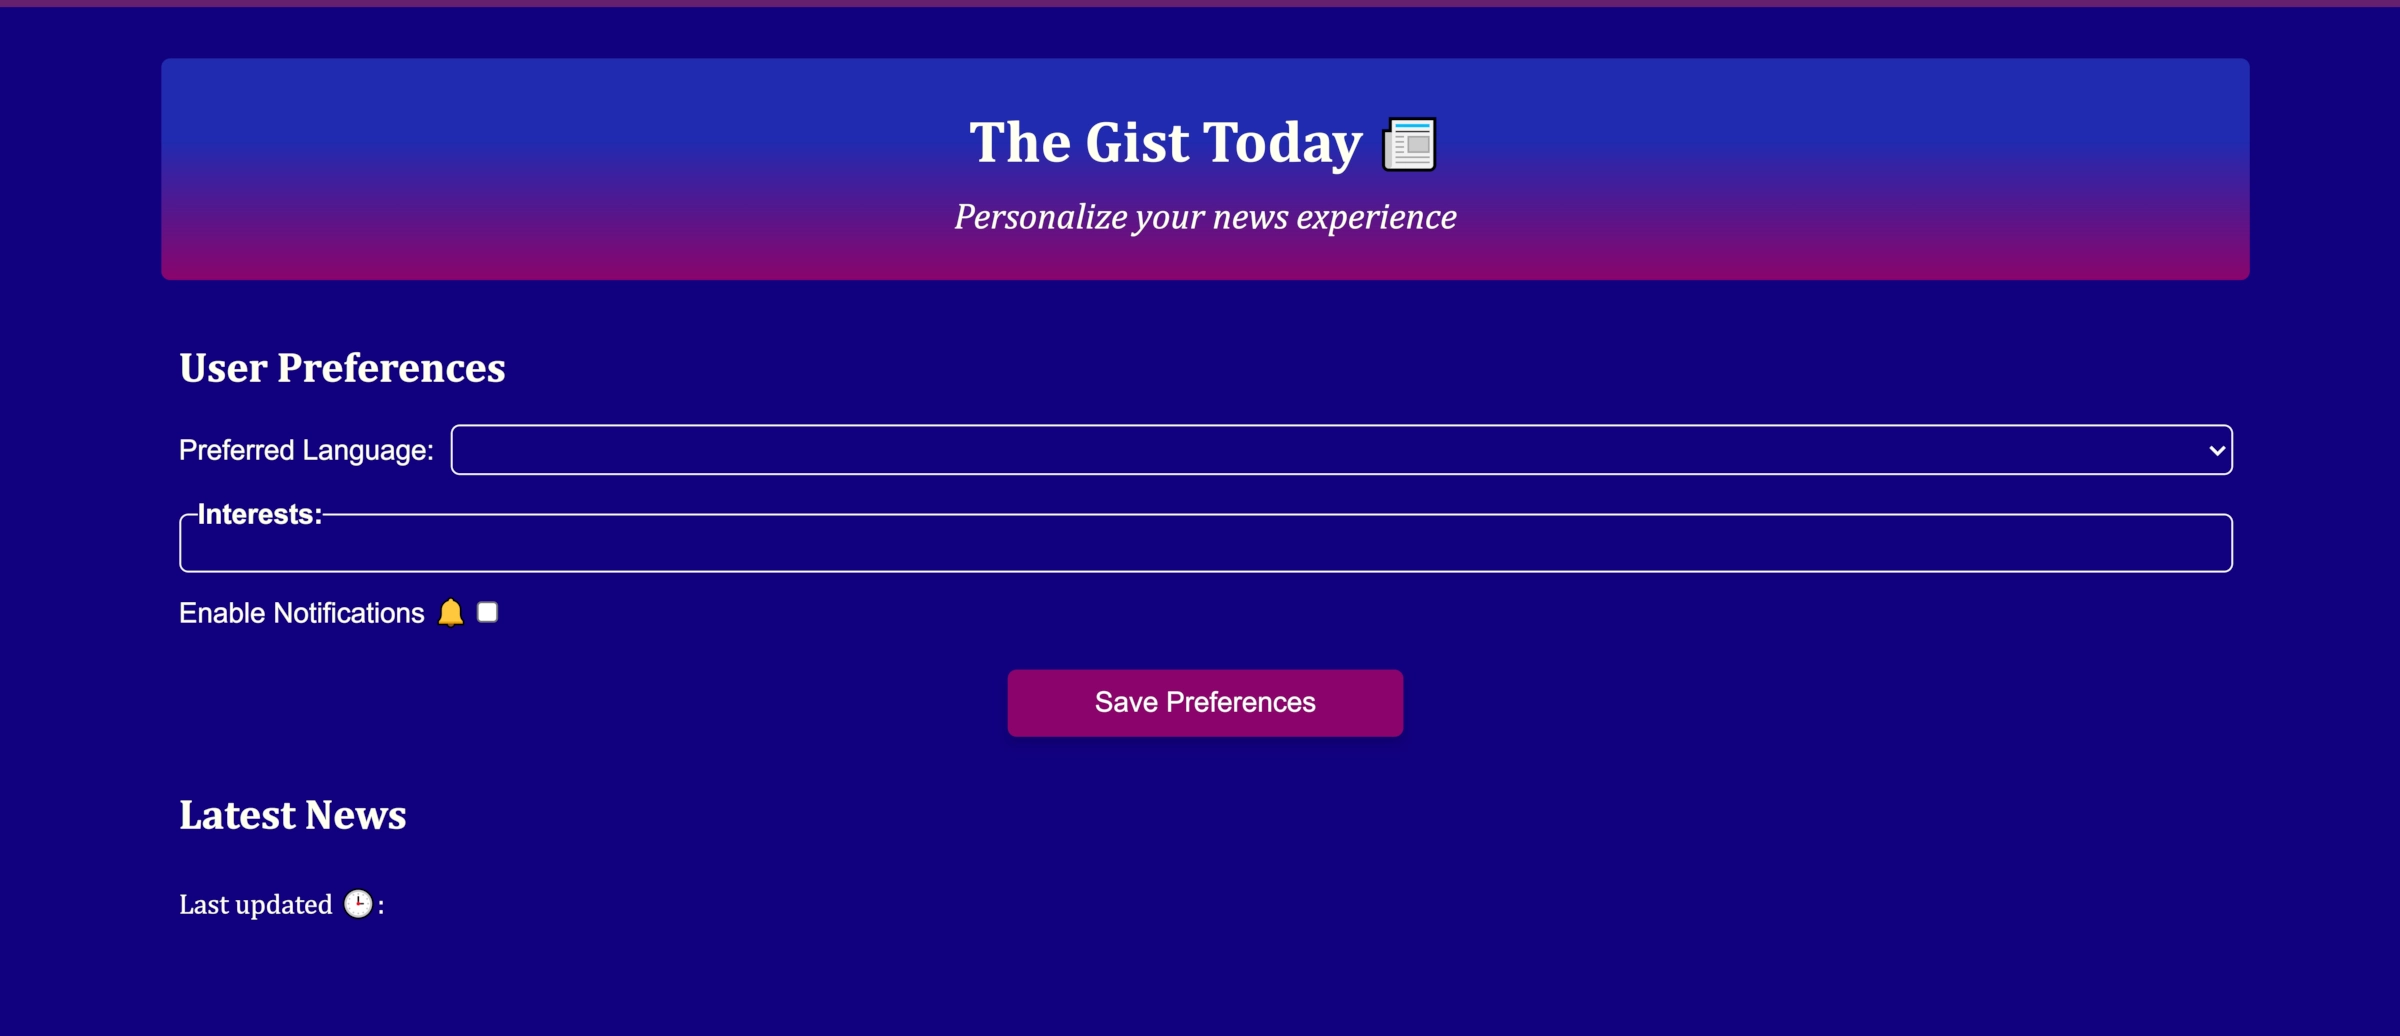
Here is how the initial scaffolding looks like:
Adding Functionality with JavaScript
In the js folder, there are 2 javascript files - utils.js and app.js. The utils.js file will contain utility functions that can be used independent of the DOM. The app.js file will implement the interactivity with the DOM.
This is an important point which I want to stress here — the reason for doing so is not merely to maintain the separation of concerns, but also because a service worker cannot import functions from a module script that references the document (like app.js would in our case).
Even if the functions themselves don't interact with the DOM, if they are defined in a module that does at any place, you cannot import that module in a service worker.
Ideally, I'd have created more files in our js folder, like config.js (to store global constants) & api.js (for API operations). But that'd be overkill for a tutorial. So to keep things simple, we'll just write every non-DOM related operation on the utils.js.
Let's start with creating some global constants and important variables which store all interest categories and supported languages.
utils.js
// Base URL for the NewsData.io API endpoint
export const BASE_API_URL = "https://newsdata.io/api/1/latest";

// API key for authentication (replace with your own, however avoid hardcoding like this in production for security)
export const API_KEY = "";

// Number of articles to fetch per interest category
export const SIZE_PER_REQUEST = 5;

// Cookie expiration time in milliseconds (setting this to 365 days)
export const COOKIE_LIFE = 365 * 24 * 60 * 60 * 1000;

// Map of available news categories with labels and emojis for UI display
export const ALL_CATEGORIES = new Map([
    ["top", {label:"Trending (Default)", emoji:"📈"}],
    ["technology", {label:"Technology", emoji:"💻"}],
    ["health", {label:"Health", emoji:"🏥"}],
    ["business", {label:"Business", emoji:"💼"}],
    ["sports", {label:"Sports", emoji:"⚽"}],
    ["entertainment", {label:"Entertainment", emoji:"🎬"}],
    ["science", {label:"Science", emoji:"🔬"}],
    ["politics", {label:"Politics", emoji:"🏛️"}],
    ["tourism", {label:"Travel", emoji:"✈️"}],
    ["food", {label:"Food", emoji:"🍔"}],
    ["lifestyle", {label:"Lifestyle", emoji:"👗"}],
    ["environment", {label:"Environment", emoji:"🌱"}]
]);

// Map of supported languages for user preferences
export const ALL_LANGUAGES = new Map([
    ["en", "English (Default)"],
    ["es", "Español"],
    ["fr", "Français"],
    ["de", "Deutsch"],
    ["it", "Italiano"],
    ["pt", "Português"],
    ["hi", "हिन्दी"],
    ["bn", "বাংলা"],
    ["ta", "தமிழ்"],
    ["zh", "中文"],
    ["ja", "日本語"],
    ["ko", "한국어"],
    ["ar", "العربية"],
    ["sw", "Kiswahili"]
]);

// Default user preferences to fall back to if none are set
export const DEFAULT_PREFERENCES = {
    interests: ["top"],
    language: "en",
    notifications: false
};
Replace the API_KEY value with your own key from NewsData.io or your chosen API.
Next, we'll be building both app.js and utils.js side by side. Please pay close attention to the file-name mentioned above each code block.
app.js
import * as utils from "./utils.js";

// Populate the language selection dropdown using ALL_LANGUAGES Map from utils.js
function create_lang_options_ui() {
    const select = document.getElementById("language-options");

    // Loop through and create each language option
    for (const [language, label] of utils.ALL_LANGUAGES) {
        const option = document.createElement("option");

        // Set the value of the option to the language code (e.g., "en" for English)
        option.value = language;

        // Set the label
        option.textContent = label;

        // Add the option to the select dropdown
        select.appendChild(option);
    }
}

// Populate the interests checkboxes using ALL_CATEGORIES Map from utils.js
function create_interests_checkboxes_ui() {
    const div = document.getElementById("interests-checkboxes");

    // Loop through and create each interest-category checkbox
    for (const [interests, { label, emoji }] of utils.ALL_CATEGORIES) {
        // Create a label element to wrap the checkbox and text
        const label_elem = document.createElement("label");

        // Set the inner HTML to include checkbox input and display text with emoji
        label_elem.innerHTML = `<input type="checkbox" name="interests" value="${interests}">${label} <span class="emoji">${emoji}</span>`;

        // Add the label (with checkbox) to the container div
        div.appendChild(label_elem);
    }
}

// Display an alert message to the user with auto-close functionality
function show_alert(alert_msg) {
    if (alert_msg.trim().length > 0) {
        document.getElementById("alert-box").classList.remove("hidden");
        document.getElementById("alert-message").textContent = alert_msg;
        setTimeout(close_alert, 10000); // Auto-close after 10 seconds
    }
}

// Hide the alert box
function close_alert() {
    document.getElementById("alert-box").classList.add("hidden");
}

// Handle form submission: validate input, request permissions, and save preferences
async function form_submit(evt) {
    evt.preventDefault();
    const data = new FormData(this);

    // Get the selected language (single value)
    const language = data.get("language");

    // Get all selected interests (multiple checkboxes can be selected)
    const interests = data.getAll("interests");

    // Validate that at least one interest is selected
    if (interests.length === 0) {
        show_alert("Select at least one interest. Otherwise, the default will be used.");

        // Use default "top" interest category if none selected (top is trending news)
        interests.push("top");
    }

    // Check if notifications are enabled (checkbox value is "1" when checked)
    let notifications = data.get("notifications") === "1";

    // If user wants notifications, prompt browser permission
    if (notifications) {
        const permission = await Notification.requestPermission();

        // Enable notifications only if permission to the browser is granted
        notifications = (permission === "granted");
    }

    // Create preferences object to save
    const preferences = {
        interests: interests,
        language: language,
        notifications: notifications
    };

    // Save preferences
    await utils.save_user_preferences(preferences);

    // Update news display section with the new preferences
    await update_news(preferences);
}

// Update the UI form fields based on saved user preferences
function update_ui(preferences) {
    document.getElementById("language-options").value = preferences.language;
    document.querySelectorAll("input[name='interests']").forEach(checkbox => {
        checkbox.checked = preferences.interests.includes(checkbox.value);
    });
    document.querySelector("input[name='notifications']").checked = preferences.notifications;
}

async function update_news(preferences) {
    // we'll write this next...
}

// This is the entry point - runs when the page loads
async function init() {
    create_lang_options_ui();
    create_interests_checkboxes_ui();
    const preferences = await utils.get_user_preferences();
    update_ui(preferences);
    await update_news(preferences);
}

// Register event listeners: form submission, alert's close button, and DOMContentLoaded
document.getElementById("user-preferences-form").addEventListener("submit", form_submit);
document.getElementById("alert-close-btn").addEventListener("click", close_alert);
document.addEventListener("DOMContentLoaded", init);
utils.js
// Save user preferences to browser cookies with expiration date
export async function save_user_preferences(preferences) {
    try {
        await cookieStore.set({
            name: "user-preferences",
            value: JSON.stringify(preferences),
            expires: (new Date(Date.now() + COOKIE_LIFE))
        });
    } catch (error) {
        console.error(`Error saving user preferences to cookies: ${error.message}`);
    }
}

// Retrieve user preferences from cookies, fallback to defaults if not found
export async function get_user_preferences() {
    let preferences;
    try {
        preferences = await cookieStore.get("user-preferences");
        preferences = JSON.parse(preferences.value);
    } catch (error) {
        console.error(`Error retrieving user preferences from cookies: ${error.message}`);
        preferences = DEFAULT_PREFERENCES;
    }
    return preferences;
}
I've extensively commented the code blocks, the following explanations will further make it clear about what each function does. Let's begin our walk through the init() in app.js, which is the entry point of our app:
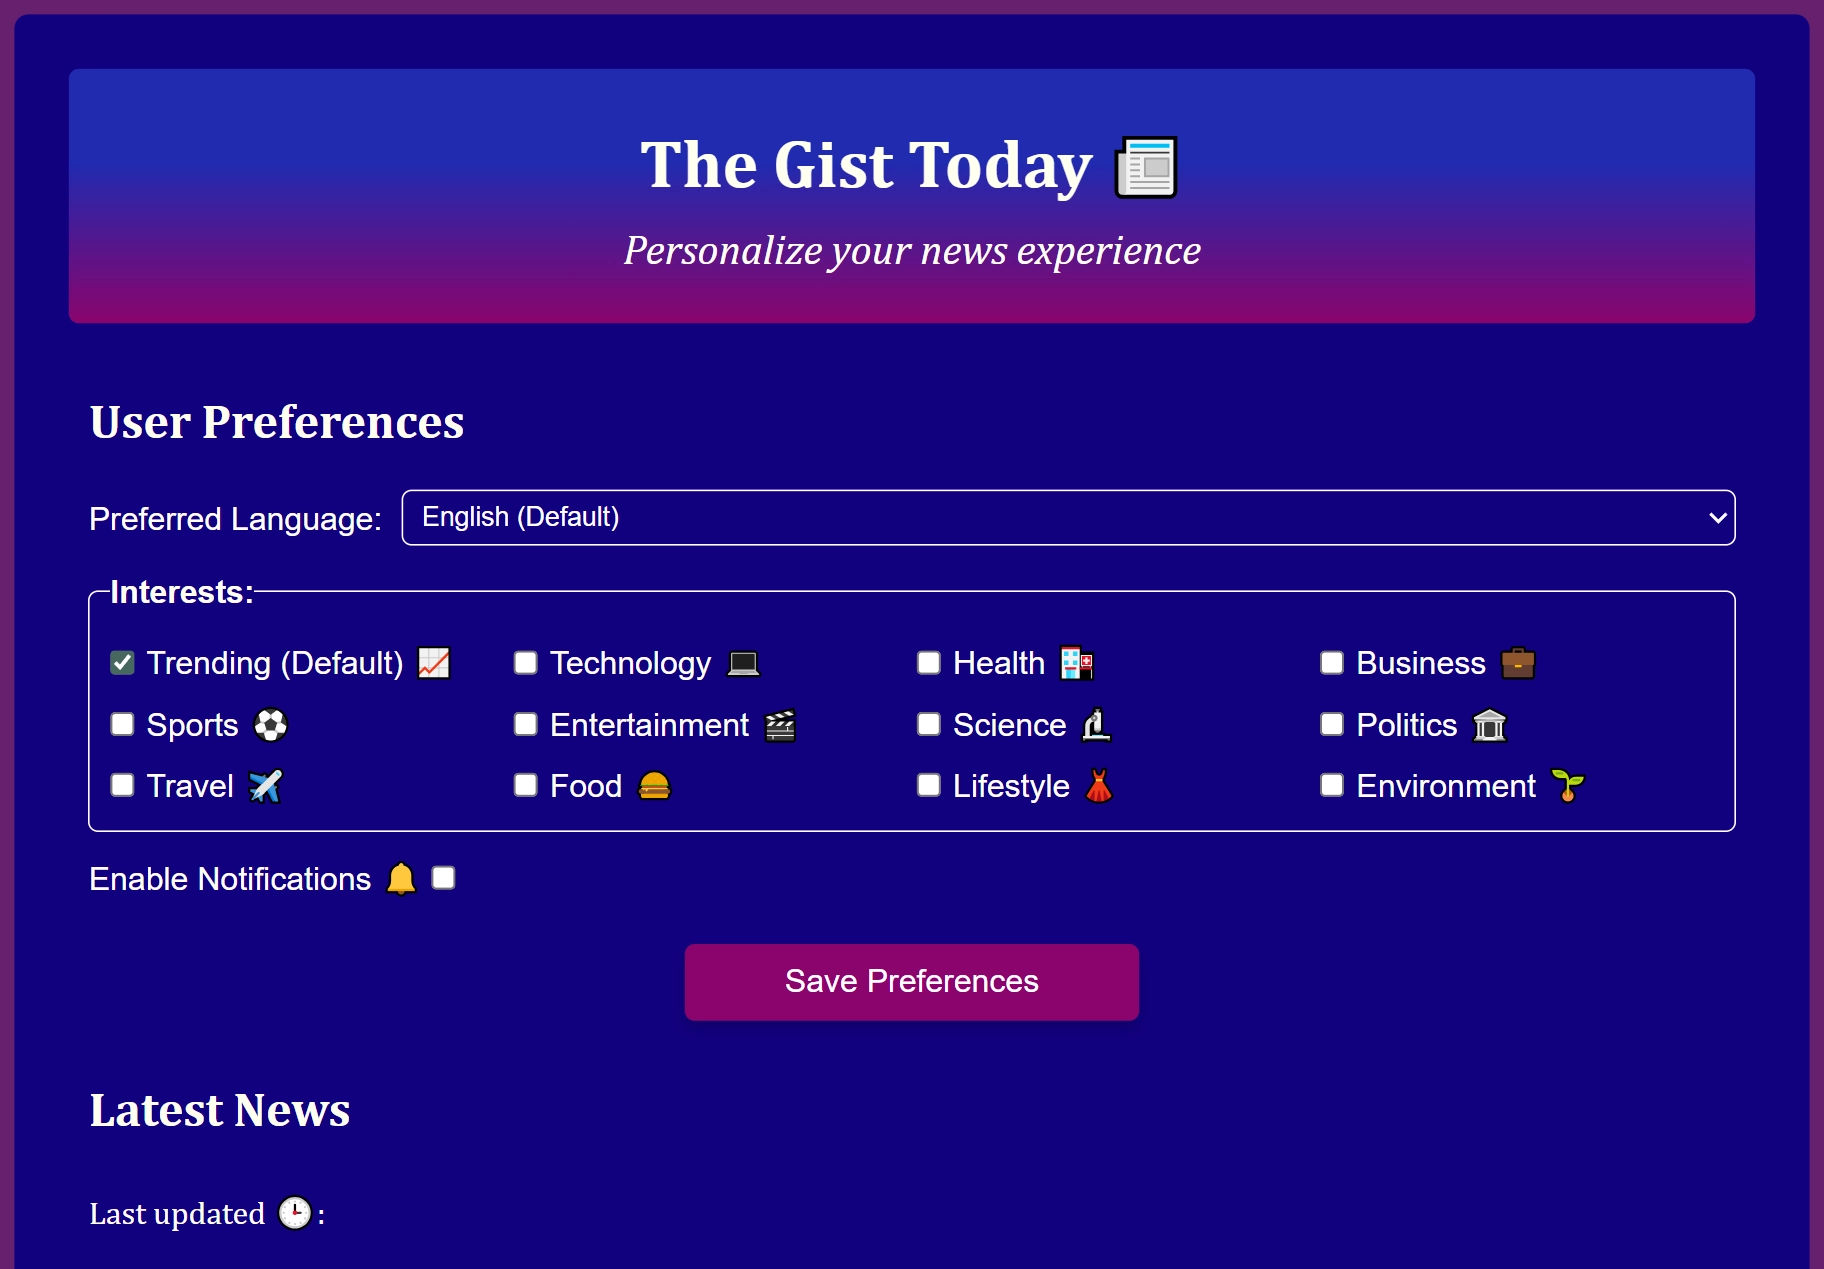
- We first populate the GUI of the form we left off in the html. The code creates and inserts the language options for the select dropdown element and interests checkboxes, using their respective functions and Maps.
- It retrieves the (previously) saved user preferences using the get_user_preferences() function from utils.js. If there are no previously saved preferences, it falls back to the DEFAULT_PREFERENCES.
- The update_ui() function updates the form fields to reflect the retrieved preferences. This is important so that the user sees their previously saved settings when they open the app next time.
- Finally, it calls the update_news() function to fetch and display news articles based on the user's preferences. We haven't written this function yet, we'll do that next in the following section.
Another significant code is the form_submit() function. Most of what it does is explained in the comments. I'd just like to highlight the part about notifications.
We use the Notification API to request permission from the user to allow notifications. The Notification.requestPermission() method opens a modal in the browser that prompts the user to allow or deny notifications.
It returns a promise that resolves to the permission status, which can be 'granted', 'denied', or 'default'. The 'default' means the user dismissed the prompt without making a choice. We enable notifications only if the permission is 'granted'.
In the utils.js file, there are 2 functions created - save_user_preferences() and get_user_preferences() that uses the CookieStore API. It has very simple set() and get() methods to store and retrieve cookies respectively. Unlike the traditional document.cookie, it works with promises and is asynchronous.
Important: The CookieStore API is new, and though it is now supported in all the modern browsers, it may not be available in the older ones. As such, if you wish to explore alternatives, then the other lightweight storage option is the service worker cache using the Cache API. We will explore that in a later section to store the news articles.
If you want something even more advanced for storing things on the client's system, then use IndexedDB. Do not use the localstorage or the http cookies, if you wish to access the stored data from the service worker as they are incompatible.
JavaScript-3: Displaying News Articles
We earlier left off creating the update_news() function in the app.js. Since most of the heavy lifting is already done by the utils.js functions, creating this will be a breeze.
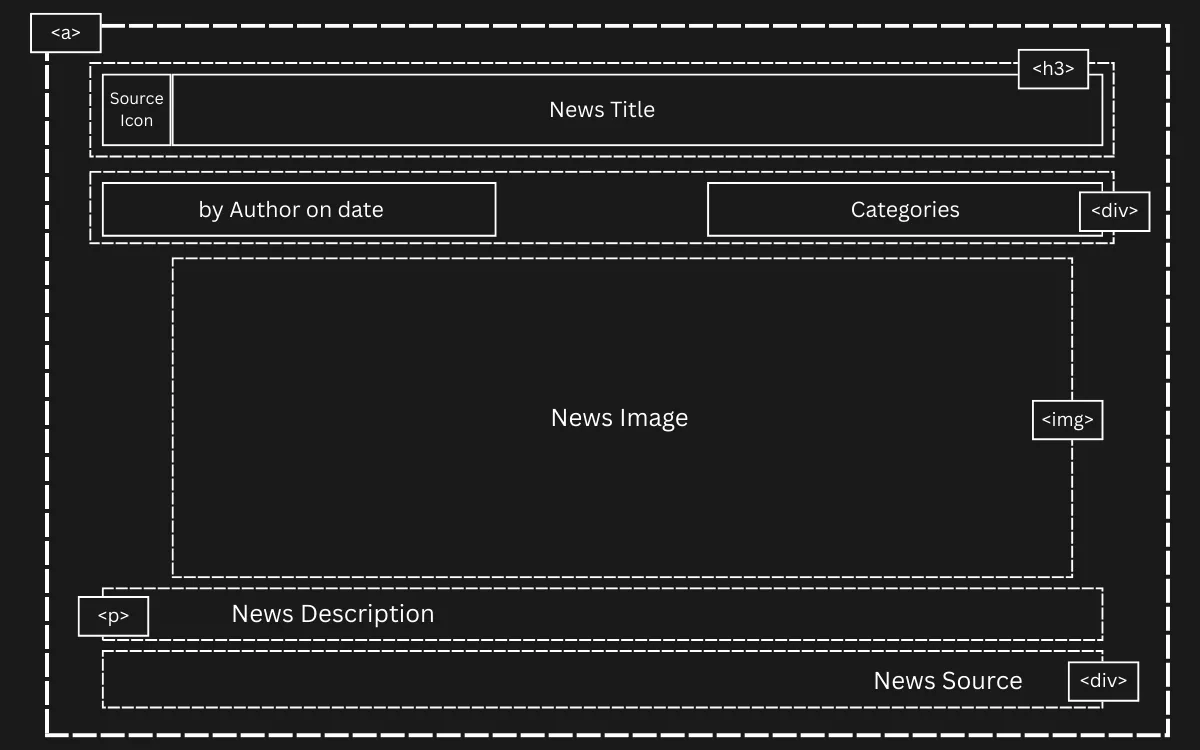
Each news article will be displayed as a card as a clickable anchor element. The above plan shows the layout, we can now write the html and the css accordingly to match this design.
app.js
// Fetch news articles and update the news display section
async function update_news(preferences) {
    const news_list = document.getElementById("news-list");

    // Store current content as backup in case of errors
    const before_update = news_list.innerHTML;

    // Show loading message while fetching
    news_list.innerHTML = "<p>Loading latest news articles...</p>";

    try {
        // Fetch articles based on user preferences
        const articles = await utils.fetch_news({
            categories: preferences.interests,
            language: preferences.language
        });

        if (Array.isArray(articles) && articles.length > 0) {
            // Build HTML content from articles
            const news_fragment = get_news_fragment(articles);

            // Replace loading message with actual content
            news_list.innerHTML = "";
            news_list.appendChild(news_fragment);

            // Update the "last updated" timestamp display
            const last_updated = (await cookieStore.get("last-updated-news"))?.value;
            document.getElementById("last-updated").textContent = last_updated || "Unknown";
        }
    } catch (error) {
        // Show error to user and restore previous content
        show_alert(error.message);
        news_list.innerHTML = before_update;
    }
}

// Build HTML elements for news articles using DocumentFragment for performance
function get_news_fragment(news_articles) {
    // Validate that we have articles to display
    if (!news_articles.length) {
        throw new Error("No articles found for your selected interests. Try different interests or check back later.");
    }

    // Use DocumentFragment to build all articles efficiently (avoids multiple DOM reflows)
    const fragment = document.createDocumentFragment();

    for (const article of news_articles) {
        // Create clickable article container
        const article_link = document.createElement("a");
        article_link.href = article.link;
        article_link.target = "_blank"; // Open in new tab
        article_link.classList.add("news-link");

        // Build optional HTML for source icon and article image
        const source_icon_html = article.source_icon ?
            `<img src="${article.source_icon}" class="source-icon" alt="${article.source_id} icon">` : '';
        const image_html = article.image_url ?
            `<img src="${article.image_url}" class="news-image" alt="${article.title}">` : '';

        // Construct the complete article HTML structure
        article_link.innerHTML = `
            <h3>${source_icon_html}${article.title}</h3>
            <div class="news-category">
                <span><em>${article.author || "Unknown"} on ${article.published}</em></span>
                <span><strong>Category:</strong> ${article.category}</span>
            </div>
            ${image_html}
            <p>${article.description}</p>
            <div class="news-source">
                <span>Source: ${article.source_id || 'Unknown'}</span>
            </div>
        `;

        fragment.appendChild(article_link);
    }
    return fragment;
}
The update_news() function first stores the current content of the news-list section as a backup, in case there are any errors during the fetch. It then shows a loading message while it calls the fetch_news() function from utils.js with the user's preferences.
If articles are successfully fetched, it calls the helper get_news_fragment() function to build the HTML structure for all the articles using a DocumentFragment. This way, all the article-cards get appended to the DOM in one go, improving performance by avoiding multiple reflows.
Lastly, we also need to update our stylesheet to style the cards. styles.css should include styles for the new classes we added, such as news-link, news-image, news-category, and news-source.
styles.css
#news-list {
display: flex;
flex-direction: column;
gap: 10px;
font-family: arial;
.news-link {
text-decoration: none;
color: inherit;
margin: 20px auto;
box-shadow: 10px 10px 20px rgb(0 0 0 / 28%);
padding: 30px 30px 20px;
border-radius: 20px;
width: min(90vw, 90ch);
max-width: 100%;
background-color: var(--card-background);
}
h3 {
margin: 5px 0;
}
p {
margin: 20px 0 30px;
}
.source-icon {
width: 24px;
height: 24px;
border-radius: 4px;
flex-shrink: 0;
margin-right: 10px;
vertical-align: middle;
}
.news-category {
display: flex;
flex-wrap: wrap;
gap: 10px;
justify-content: space-between;
margin: 10px 0;
font-size: 15px;
font-family: cambria;
}
.news-image {
width: 90%;
height: auto;
max-height: 450px;
object-fit: cover;
border-radius: 8px;
margin: 20px auto;
display: block;
}
.news-source {
font-size: 15px;
text-align: right;
font-family: Cambria;
font-style: italic;
}
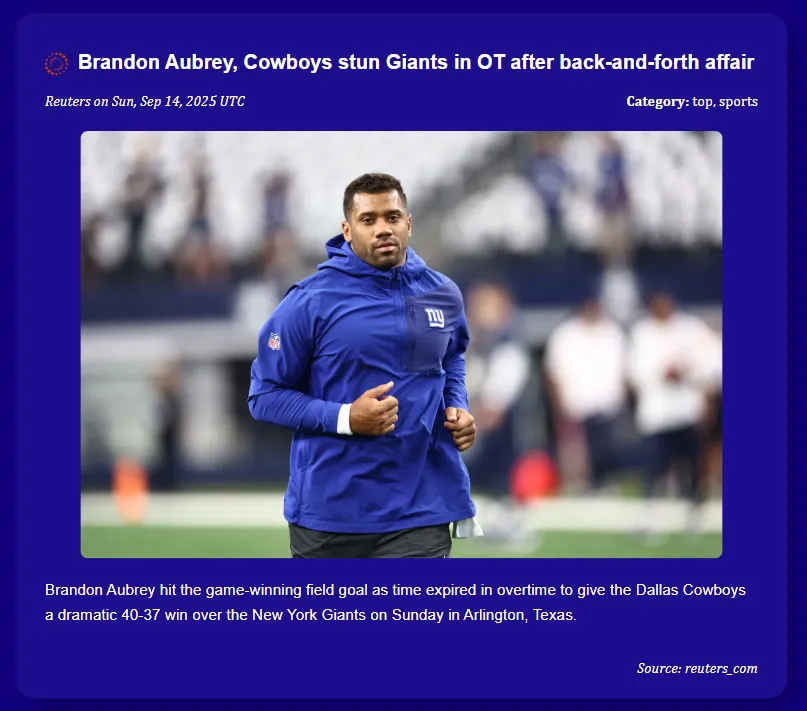
}Each news article is displayed in a card-like format as we designed earlier with a shadow, padding, and rounded corners.
Phew! With this, our application's logic and core functionality is complete. It can fully work on its own now. However, to make it as a PWA, we still need a couple of things, namely a service worker and a manifest file. Let's do that next.
Writing manifest.json
The manifest.json file is a simple JSON file that provides important information about our web application — name, icons for different cases, start URL, theme color etc. This information is used by the browser and the underlying operating system when the app is installed on a user's device.
If you remember, we already added a link to the manifest file in the head of our HTML file. That step is crucial, now let's write the actual file.
manifest.json
{
  "name": "The Gist Today",
  "short_name": "Today's Gist",
  "description": "Stay informed with personalized news from around the world. A Progressive Web App that delivers news based on your interests and preferred language.",
  "id": "/",
  "start_url": "./",
  "scope": "./",
  "display": "standalone",
  "orientation": "portrait-primary",
  "lang": "en",
  "dir": "ltr",
  "theme_color": "rgb(17, 0, 126)",
  "background_color": "rgb(17, 0, 126)",
  "categories": ["news", "productivity", "lifestyle"],
  "icons": [
    {
      "src": "assets/icons/favicon.png",
      "sizes": "48x48",
      "type": "image/png",
      "purpose": "any"
    },
    {
      "src": "assets/icons/icon-144.png",
      "sizes": "144x144",
      "type": "image/png",
      "purpose": "any"
    },
    {
      "src": "assets/icons/icon-180.png",
      "sizes": "180x180",
      "type": "image/png",
      "purpose": "any"
    },
    {
      "src": "assets/icons/icon-192.png",
      "sizes": "192x192",
      "type": "image/png",
      "purpose": "any"
    },
    {
      "src": "assets/icons/icon-512.png",
      "sizes": "512x512",
      "type": "image/png",
      "purpose": "any"
    },
    {
      "src": "assets/icons/icon-1024.png",
      "sizes": "1024x1024",
      "type": "image/png",
      "purpose": "any"
    },
    {
      "src": "assets/icons/icon-maskable-192.png",
      "sizes": "192x192",
      "type": "image/png",
      "purpose": "maskable"
    },
    {
      "src": "assets/icons/icon-maskable-512.png",
      "sizes": "512x512",
      "type": "image/png",
      "purpose": "maskable"
    }
  ],
  "screenshots": [
    {
      "src": "assets/screenshots/desktop-home.png",
      "sizes": "1280x720",
      "type": "image/png",
      "form_factor": "wide",
      "label": "Home screen showing news articles and preferences"
    },
    {
      "src": "assets/screenshots/mobile-home.png",
      "sizes": "720x1280",
      "type": "image/png",
      "form_factor": "narrow",
      "label": "Home screen showing news articles and preferences"
    }
  ],
  "related_applications": [],
  "prefer_related_applications": false,
  "display_override": ["window-controls-overlay", "standalone", "minimal-ui"],
  "launch_handler": {
    "client_mode": "focus-existing"
  },
  "handle_links": "preferred",
  "capture_links": "existing-client-navigate",
  "edge_side_panel": {
    "preferred_width": 400
  }
}
Here are the explanations for some of the important fields above-
- start_url: The page that opens when users launch the app from their home screen or app drawer.
- display: Controls how the app appears - "standalone" makes it full-screen and looks like a native app without any browser's UI.
- display_override: Fallback display modes if "standalone" isn't supported.
- scope: Defines which pages belong to our PWA - "./" means all pages in the app's directory.
-
background_color & theme_color: Background shows during app launch; theme colors the browser/status bar of the device. We have chosen the same for both- a dark blue indigo,
rgb(17, 0, 126), which is also the theme color in the css. - orientation: Locks the app to portrait mode on mobile devices.
- icons: Different sized icons for various contexts (home screen, splash screen, etc.). "any" purpose icons are standard, while "maskable" ones adapt to different shapes (like Android adaptive icons).
-
screenshots: These provide previews when a user installs a PWA. There are only 2 for this demo, but ideally you'd want to showcase different features of your app here.
- launch_handler: Controls what happens when users open the app multiple times. In our case here, it focuses the existing window instead of opening a new one.
- handle_links & capture_links: Manages how external links are handled. "preferred" means the app will try to open links itself if possible, while "existing-client-navigate" means links will open in the existing app window if it's already open.
- edge_side_panel: Microsoft Edge-specific feature for side panel display.
Different devices and platforms use manifest.json data in their own ways. For example, Android uses the icons for the home screen and splash screen, while Windows uses them for the Start menu and taskbar.
Similarly, iOS earlier did not support reading the manifest file, but now it does partially. However, it still relies on specific meta tags in the HTML for some features, which we covered in the HTML section.
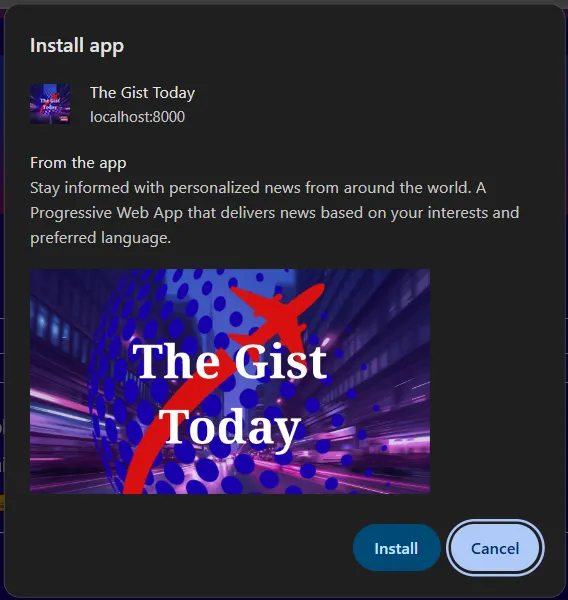
Once you add the manifest file, you'll see a small install icon in the address bar of your browser when you visit the page. Clicking on it will prompt you for the installation with a nice looking widget, showing description and screenshots as created in the manifest.json file above.
Make sure you're opening the page either from an https enabled server or from your localhost. Just opening the html file directly in the browser won't work. See the faqs section at the end if you need help.
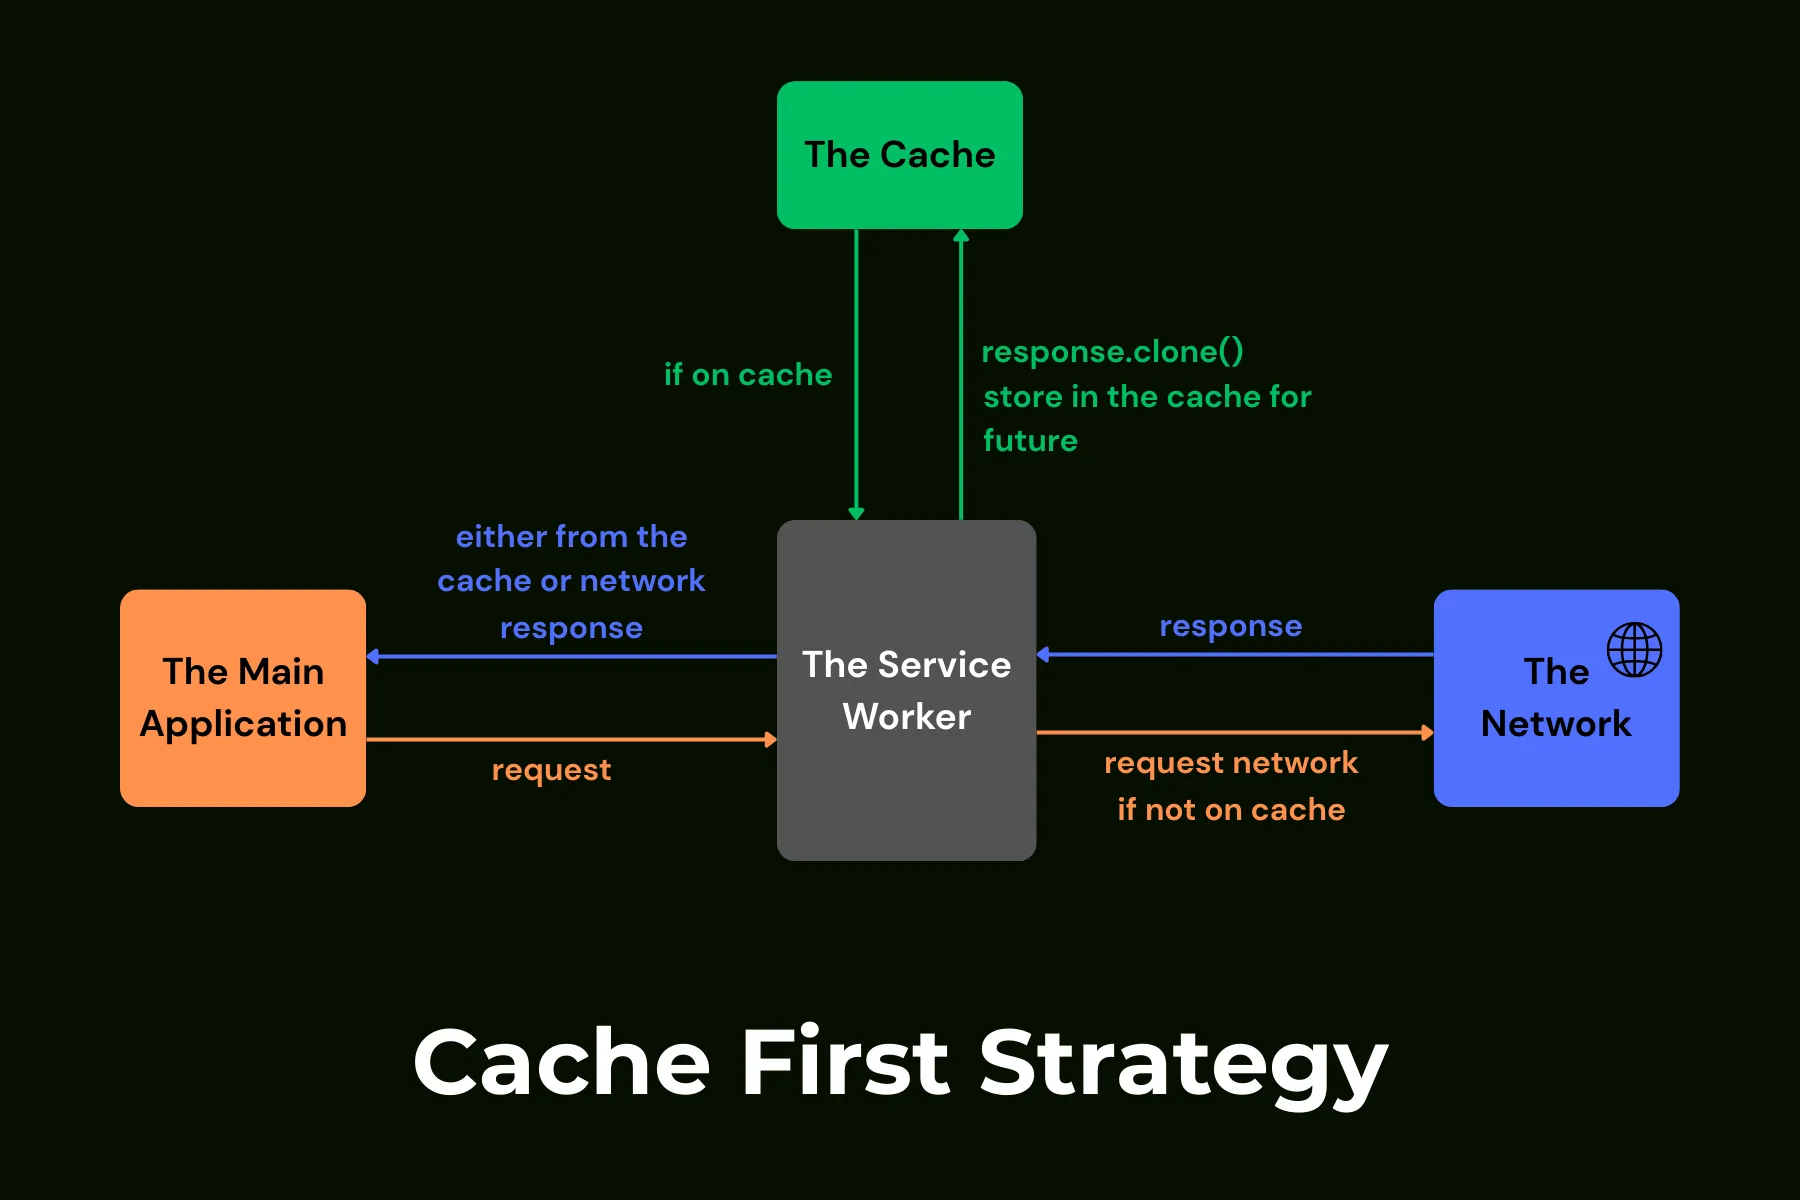
Understanding Service Worker: The Basics
A service worker is the heart of a PWA. Essentially, it is another script that runs separately in the background, independent of the main application. It is this script that enables features that traditional web applications cannot have, such as offline functionality, background sync, and push notifications.
It can intercept and handle network requests. This allows us to implement many types of caching techniques to improve performance and reliability. The service worker can also work when there is no active tab or open window of the application. As such, it can make these network requests in the background and store them in the cache in advance.
This is what makes offline functionality possible: when a user loses their internet connection and tries to use the app, the service worker can step in and serve content directly from its cache.
Service workers are event-driven — we implement features by creating functions and registering them as event listeners for specific events. The browser calls these functions when the corresponding trigger or events occur.
Some common events are installation & activation which pertains to the lifecycle of a service worker, while others are related to specific functionalities.
Now, with enough background, let's start step-by-step with building our service worker.
Registration
First, we need to register our service worker script in the main app. This would be a one-time process and it is pretty straightforward:
app.js
// Register the service worker
async function service_worker_registration() {
    // Check if the browser supports service workers
    if ('serviceWorker' in navigator) {
        try {
            console.log("Registering service worker...");

            // Register the service worker file (sw.js)
            await navigator.serviceWorker.register("./sw.js", {
                scope: "./",      // Control all pages in this directory
                type: "module"    // Allow ES6 imports in service worker
            });

            console.log("Service Worker registered successfully.");
        } catch (error) {
            // Service worker registration failed (maybe browser doesn't support it)
            console.error('Service Worker registration failed:', error.message);
        }
    }
    // If service workers aren't supported, the app still works without offline features
}
Though service workers are now widely supported in all modern browsers, we still check for their availability to be sure. If supported, the main code here is calling the navigator.serviceWorker.register() with the path of our script file (./sw.js), which registers it as the service worker.
The scope option determines which pages the service worker can control. By setting it to "./", we are giving it control over all pages at or below the directory where our sw.js is located, which in our case is the root. This means this service worker can manage the entire app.
The type "module" will allow us to import other JS modules, like utils.js, into our service worker script file.
Notice, we register the service worker in the app.js. We also need to update our init() function in the same file to call this registration function:
async function init() {
    //...existing code...
    await service_worker_registration();
}
Installation
The install event is fired on two circumstances:
- When registration happens for the first time.
- When there is a new version of the registered script file (sw.js). For any minor change in that file, like say, even a comma on a comment, the browser will consider it a new version and fire the install event.
We can attach an event listener to the install event and perform some initiating tasks, like caching static assets of our app.
Once the service worker is installed, it might have to wait for the older service worker, if present, to retire, before it takes charge. This happens when the user closes all of the active clients (tabs, windows, apps open in the user's device) running our PWA.
It is designed this way to ensure only one service worker can be active at a time.
However, we can force the browser to immediately activate our new service worker and retire the older one by calling self.skipWaiting() inside the install event listener.
Activation
Once the service worker is ready to take control, the browser fires the activate event. An event-handler here can perform cleanup tasks associated with the previous service worker- like deleting old caches that are no longer needed.
An important thing to note is, even when the new service worker is activated, the user still needs to refresh the existing open clients for the change to reflect. By calling self.clients.claim() we can force the service worker to take control of all existing clients immediately and silently in the background without any refresh.
Here is the code that implements all these concepts:
sw.js
// version 1

import * as utils from "./js/utils.js";

// Cache names with version numbers (increment when updating cached resources)
const STATIC_CACHE_NAME = 'static-v1';
const DYN_CACHE_NAME = `dynamic-v1`;

// App shell files that need to be cached for offline functionality
// These are the core files needed for the app to work offline
const STATIC_APP_SHELL = [
    '/',
    '/index.html',
    '/css/stylesheet.css',
    '/js/app.js',
    '/js/utils.js',
    '/manifest.json',
    '/assets/icons/icon-192.png',
    '/assets/icons/icon-512.png',
    '/assets/icons/icon-180.png',
    '/assets/icons/icon-144.png',
    '/assets/icons/icon-maskable-512.png',
    '/assets/icons/icon-maskable-192.png',
    '/assets/icons/notification-badge.png',
    '/assets/icons/favicon.png'
].map((url) => new URL(url, self.location.href)); // Convert to absolute URLs

// How long cached data stays fresh before needing update (24 hours)
const STALE_TIME = 24 * 60 * 60 * 1000;

// Maximum number of requests to store in the service-worker cache (you can safely increase this)
const MAX_CACHE_SIZE = 240;

// Register service worker event listeners: install, activate, fetch
self.oninstall = (evt) => evt.waitUntil(install_service());
self.onactivate = (evt) => evt.waitUntil(activate_service());
self.onfetch = (evt) => evt.respondWith(fetch_service(evt));

// Install event listener
async function install_service() {
    try {
        console.log("Installing service worker...");

        // Open/Create the static cache and store all app shell files
        const cache = await caches.open(STATIC_CACHE_NAME);
        await cache.addAll(STATIC_APP_SHELL);

        // Skip waiting phase to activate immediately
        await self.skipWaiting();

        console.log("Service Worker installed successfully.");
    } catch (error) {
        console.error("Error during SW installation:", error.message);
        // Re-throw to fail installation if critical files can't be cached
        throw error;
    }
}

// Activate service worker and clean up old caches
async function activate_service() {
    try {
        console.log("Activating service worker...");

        // Get all existing cache names
        const key_list = await caches.keys();

        // Find old cache versions that should be deleted
        const keys_to_delete = key_list.filter(key =>
            key !== STATIC_CACHE_NAME && key !== DYN_CACHE_NAME
        );

        // Delete all old caches in parallel
        await Promise.all(keys_to_delete.map(key => caches.delete(key)));

        // Take control of all existing clients immediately
        await self.clients.claim();

        console.log("Service Worker activated successfully.");
    } catch (error) {
        console.error("Error during SW activation:", error.message);
        throw error;
    }
}
First, the utils.js module is imported so that we can use its functions inside this service worker script.
We'll create 2 caches later- one for the static files (for our application's shell and also other 'static' assets like images) and one for the dynamic content (like the news articles).
The constants STATIC_CACHE_NAME and DYNAMIC_CACHE_NAME pre-define the names of these caches with version numbers which is a simple way to manage updates later.
The STATIC_APP_SHELL array contains all the essential barebone files that our app needs to function offline. The map on the array: map((url) => new URL(url, self.location.href)); converts the relative URLs to the absolute URLs.
For e.g. /index.html becomes https://your-site.com/index.html. This is because the assets are always requested with absolute URLs by the browser.
The events we registered: install, activate and fetch, are all extendable events. These events can be prolonged by calling evt.waitUntil(promise) inside the event listener.
The browser will wait for the promise to settle before it considers the event complete. This is useful because we can perform asynchronous tasks during these events and ensure they complete before moving on.
In the install event listener, the function cache.open() opens a cache with the given name or creates it if it doesn't exist. This cache can be used to store key-value pairs, where the key can be any string (often the request or its URL) and the value can be any data (often the response).
Here, we add all the application's shell files to the static cache using cache.addAll(). The self.skipWaiting(), as explained previously, is called to immediately activate the new service worker.
In the activate event listener, we first get all existing cache names using caches.keys(). We then filter out all except the current ones and delete them (the older ones, if present) using caches.delete().
This ensures there are no old caches taking up space. Finally, we call self.clients.claim() to take control of all existing clients without the user needing to refresh.
In the next and final section of building this application, we'll write the fetch event listener to intercept network requests and implement some more advanced capabilities.